YOU CAN CLICK ON THE PICTURES TO ENLARGE THEM AND ZOOM IN
1.Pull ribbon cable locks out for all 4 connectors, 2 on main board, 1 on each interposer.

2. Insert 6″ ribbon cable in to unlocked connector on ppu interposer and lock it in.
If you received 2 8″ cables due to shortage of 6″ cables simply use an 8″ cable for both interposers!

3. Insert 8″ ribbon cable in to unlocked connector on cpu interposer and lock it in.

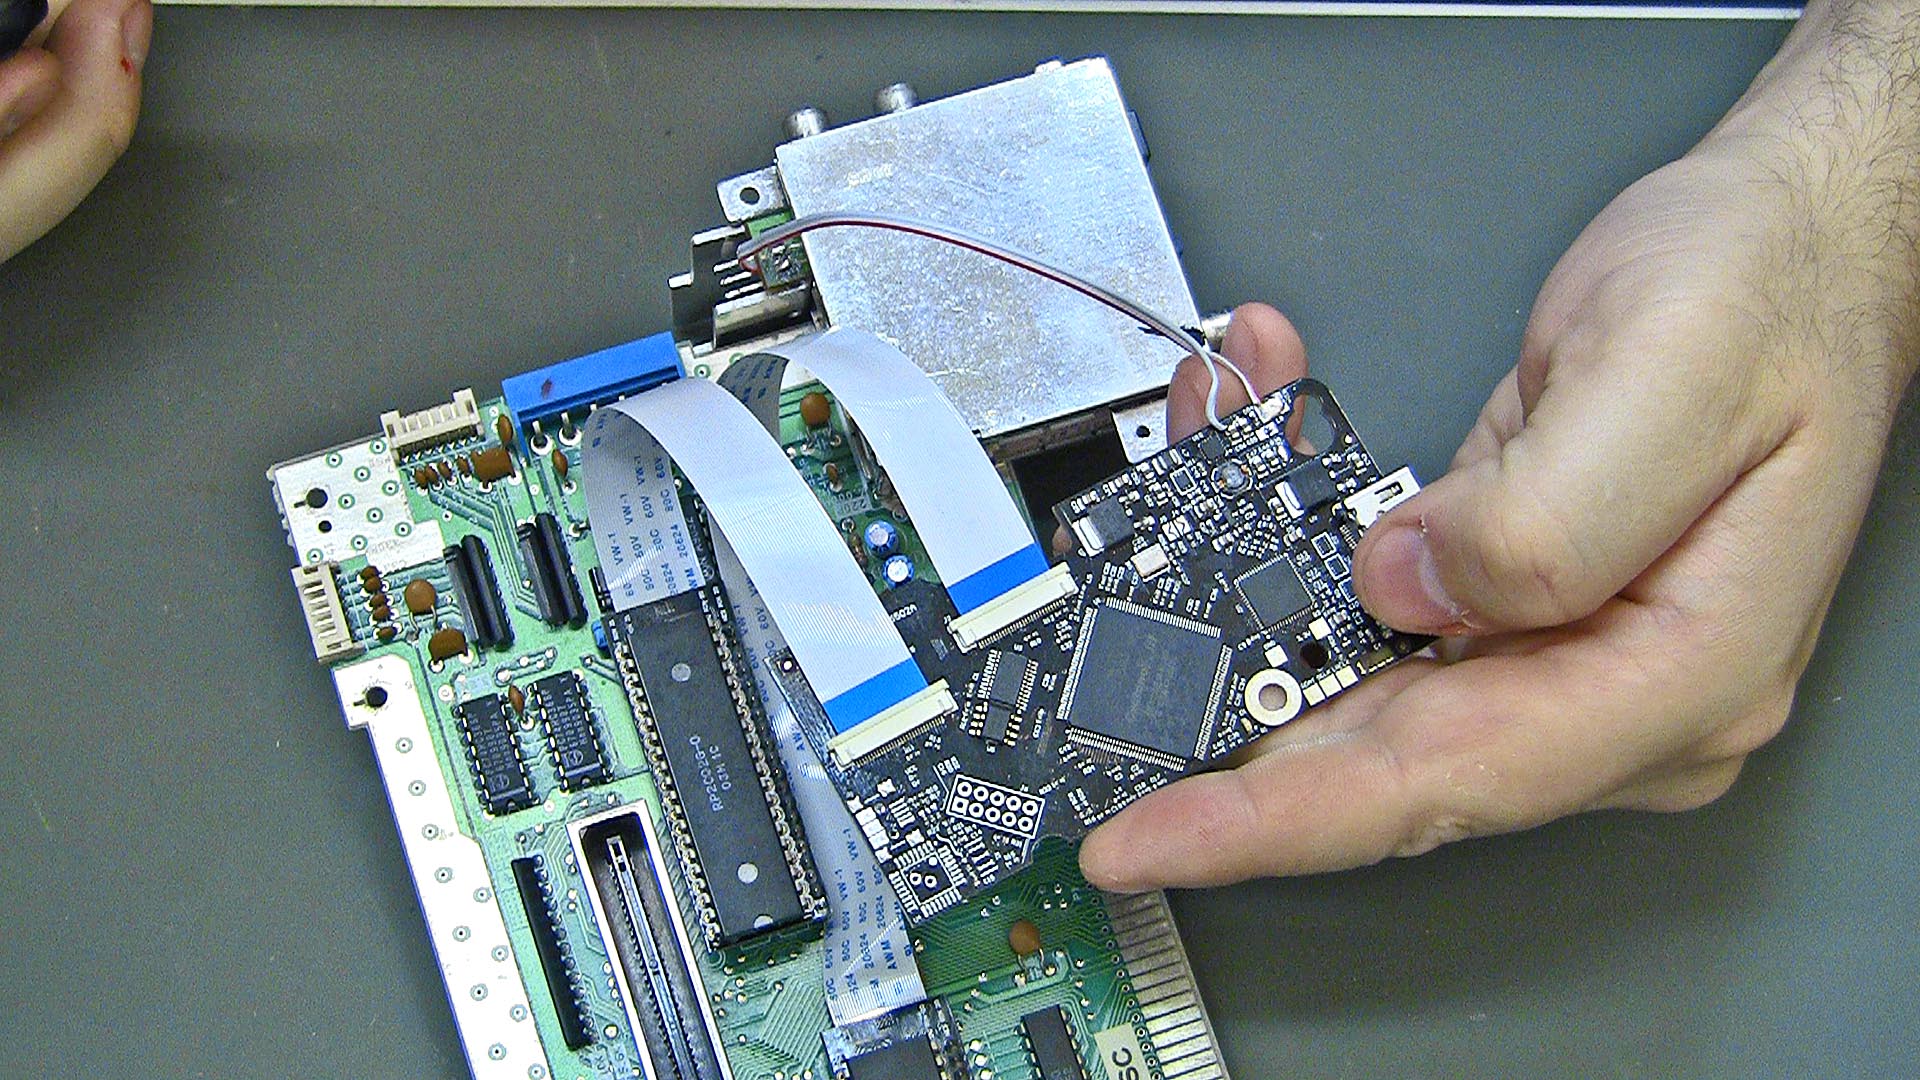
4. Insert interposers in to sockets on nes mobo, then insert cpu or ppu in to correct interposer sockets.
RP2A03 is the CPU, RP2C02 is the PPU for NTSC consoles (US, Canada, Japan, etc).
RP2A07 is the CPU, RP2Co7 is the PPU for PAL consoles (Europe etc).

5. CPU cable may need to be routed around ppu interposer.

6. Prep 6 inches of 2 conductor ribbon cable or similar, 28 gauge or thicker, mark one as your ground on both ends.

7. Solder leads to hole where 7805 was pulled from, center hole is ground and inside hole is input voltage, outside hole is not used.

8. Solder the other end of the 6 inch lead to the pads for voltage in and ground.

9. Insert and lock corresponding ribbon cables to main board.
10. Mount hi-def main board to bottom shell using screw and nut provided. It’s a 1/16 allen key, but T-7 Torx also works.
11. Attach cartridge, power/reset, and controller connectors to nes motherboard.

12. Insert tray, make sure front tab is under nes mobo.


13. Screw in a couple screws to secure in place and test your work.
14. If the kit works replace the other screws to nes mobo.
15. Place top shell on to nes and fasten with 6 philips screws.
ENJOY!!!!!!!!!