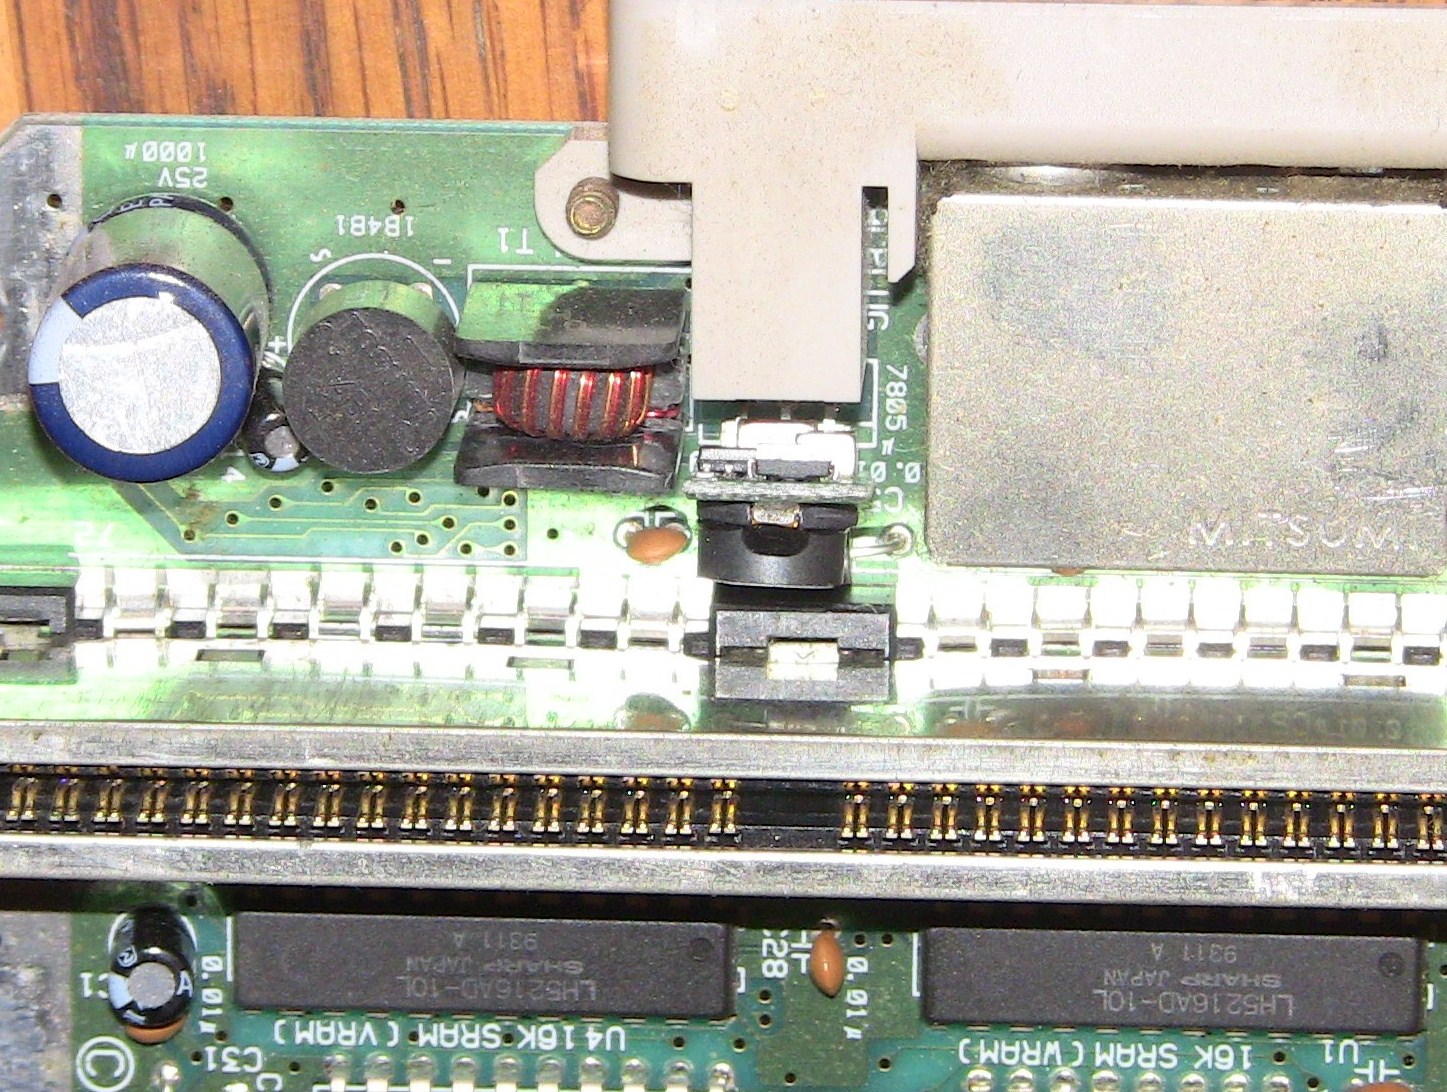
I was reading through the vast “good ones – bad ones” guide on the sega-16.com forums and a few posts on page 9 got my attention. A member was trying to install an internal power supply in a sega genesis, great idea, but it gets better. He went on to explain the benefits of a switching power supply, but here is a better summary written later from fellow modder Bacteria: “Regulators like the 7805 are inefficient, about 60% efficient as I recall, and burn off the excess voltage as heat. Switching regulators work considerably more efficiently, up to about 95% or thereabouts, so are far more efficient and also don’t generate heat.”
I was hooked!
Initial testing.
I wanted a baseline for power consumption of some different wall adapters.
The Kill A Watt meter is very useful around the house and came in real handy for these tests.
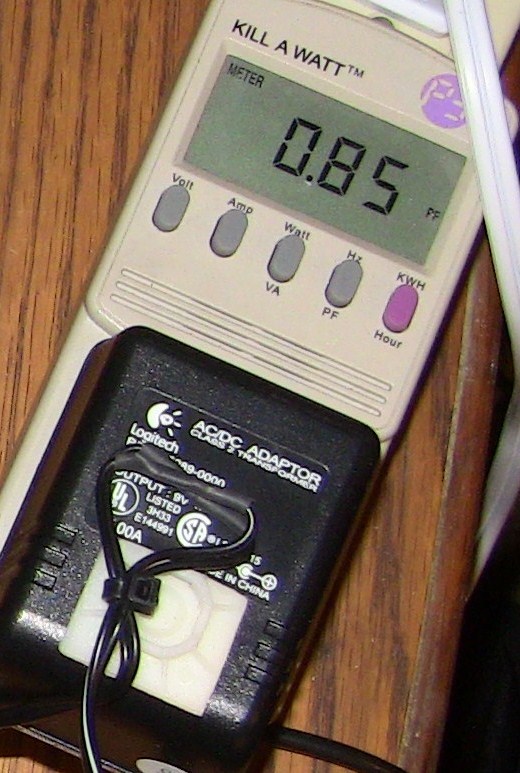
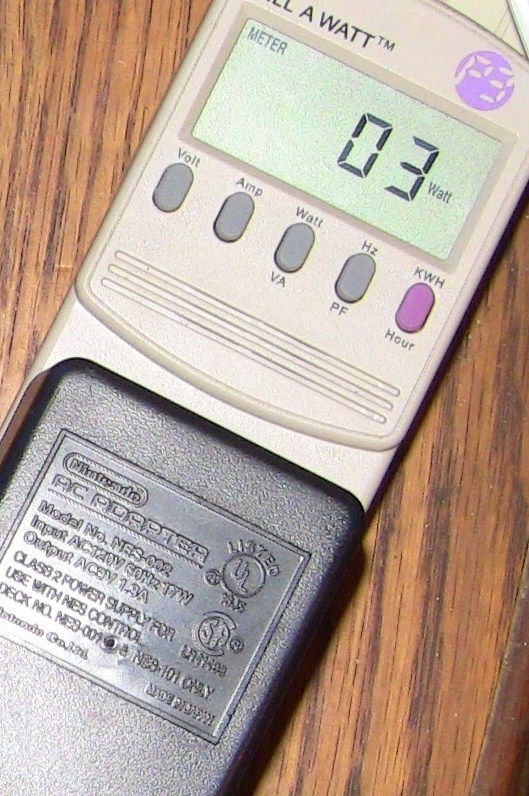
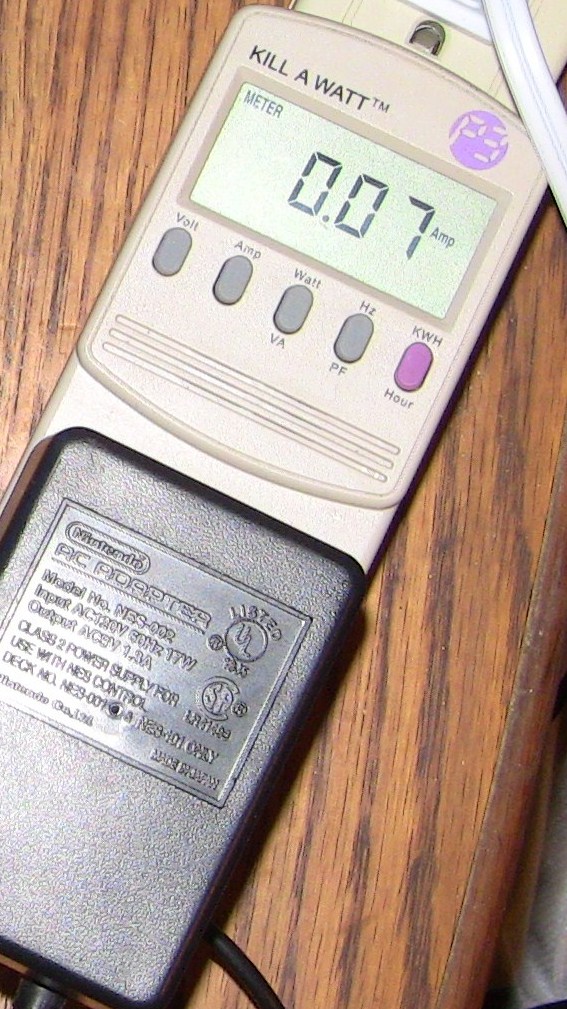
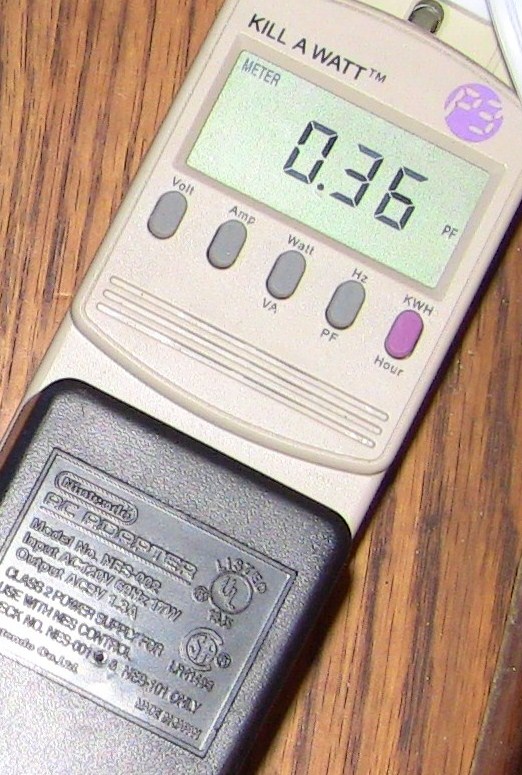
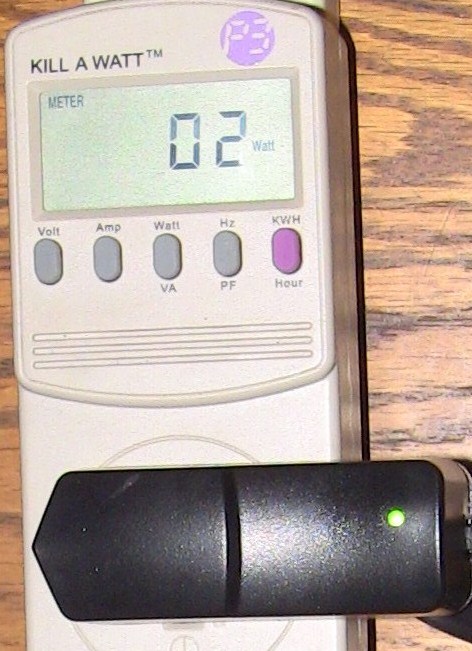
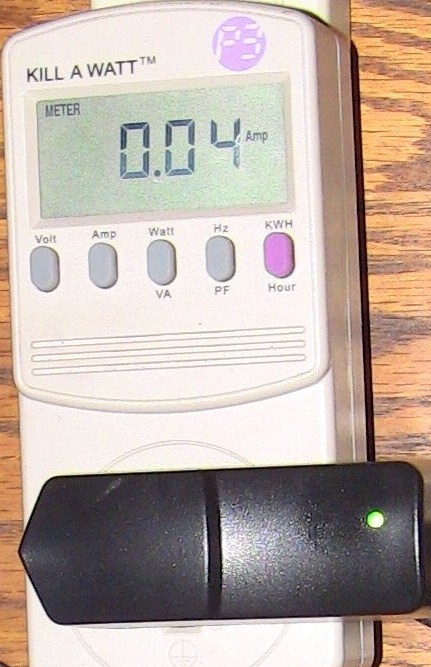
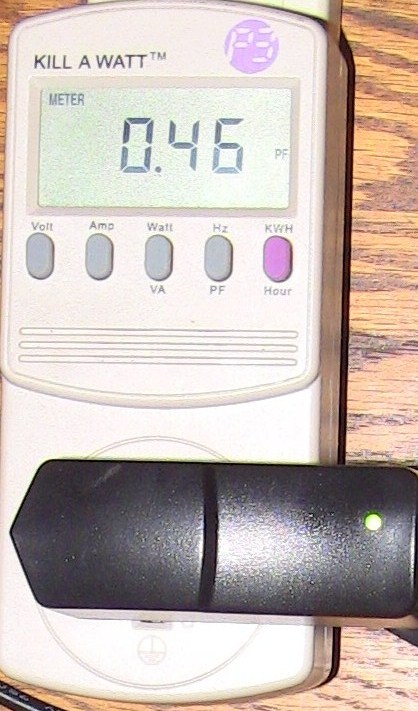
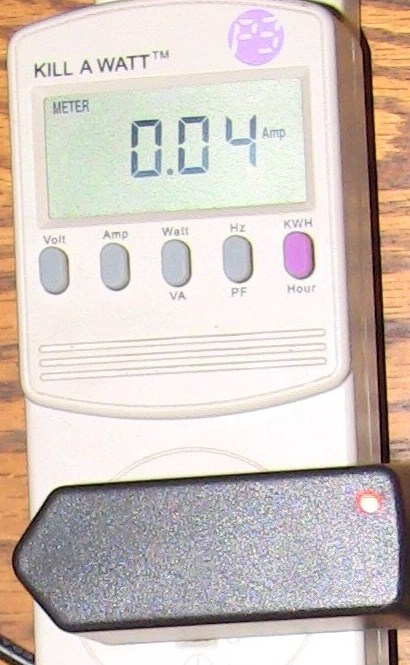
Power consumption readings with an nes-002 9vac wall cube running an unmodded nes-101: watts, amps, and PF(power factor).

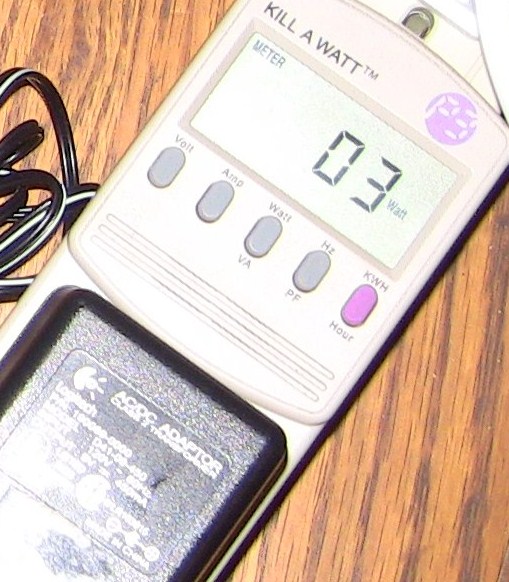
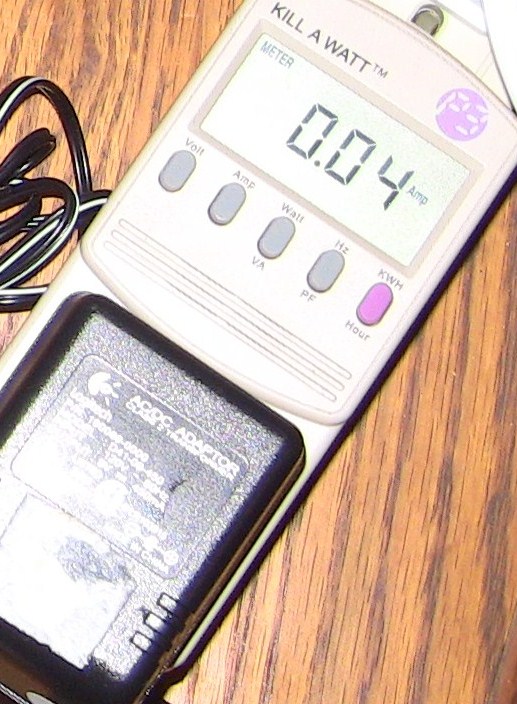
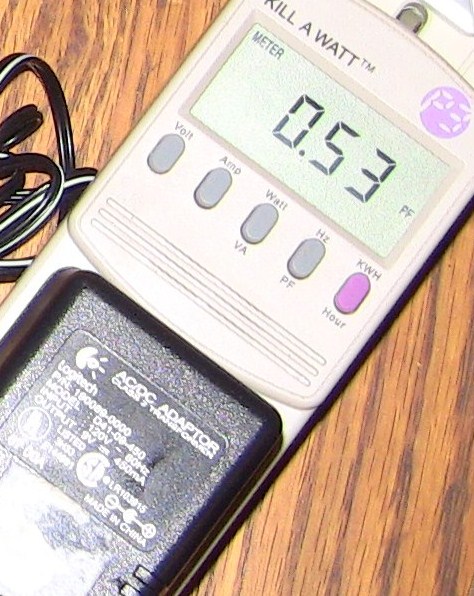
Power consumption readings with an 9vdc wall cube running an unmodded nes-101:
Power consumption readings with an 12vdc wall cube running an unmodded nes-101:
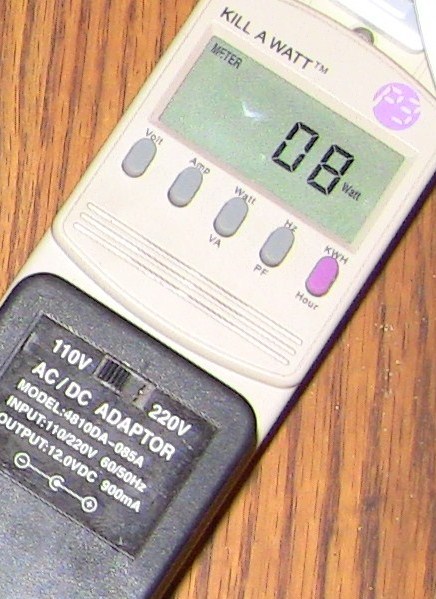
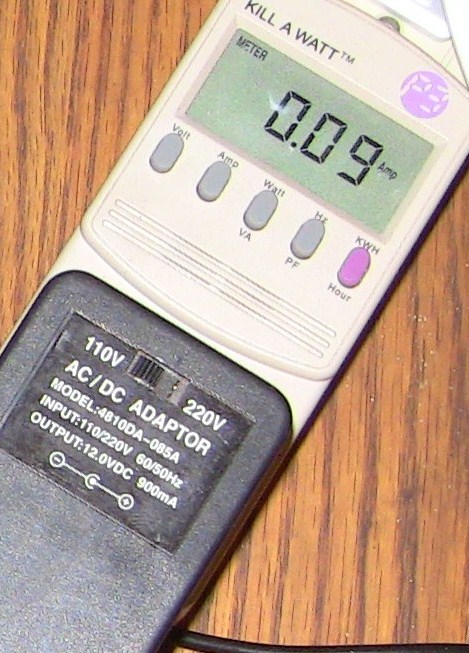
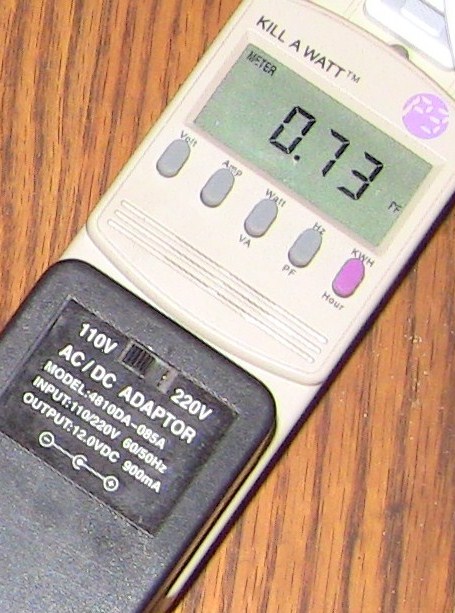
I had to rewrite this page when I finally got all this initial test work completed. If you’ll notice, the 9v DC adapter uses less power than the 9V AC and the 12V DC adapters, and it has the best PF. The 12vdc unit has a better PF than the 9vac unit, but uses more power. I could probably expand this section and include thousands of different adapters, maybe the logitech 9vdc unit I happen to test is a really good one..
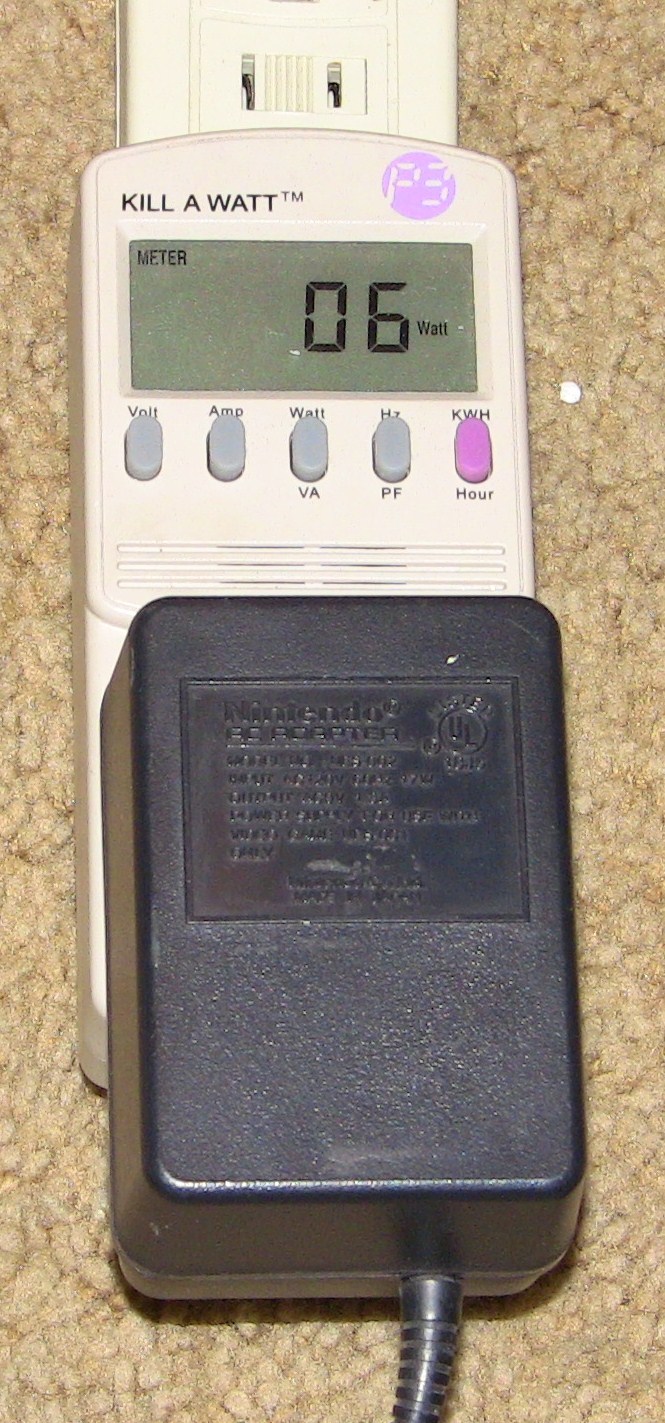
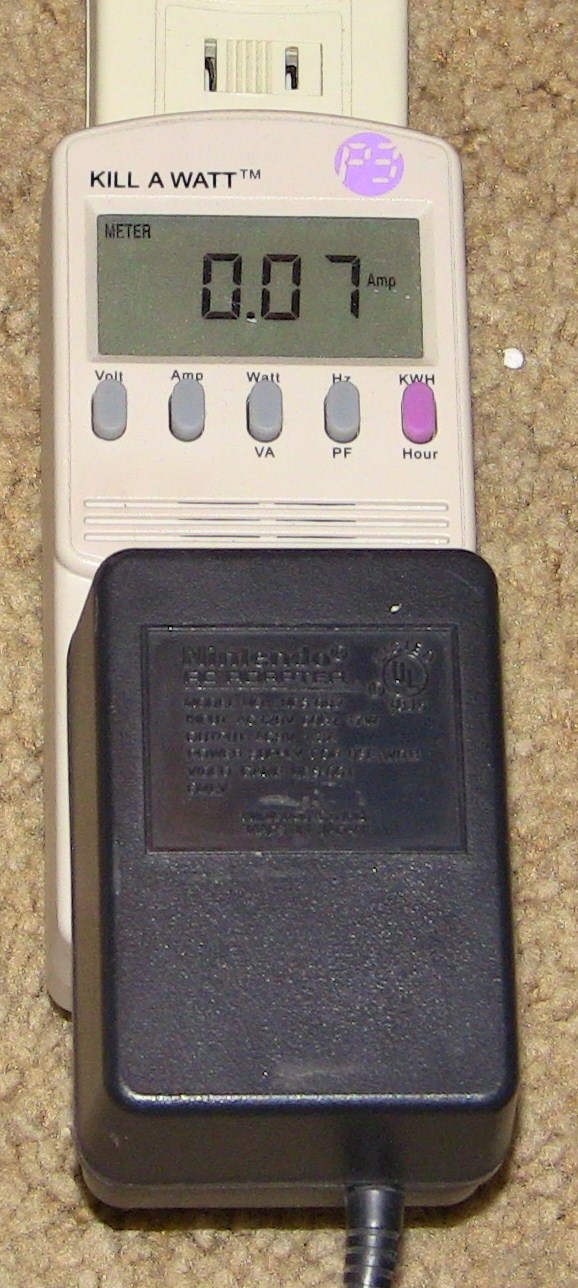
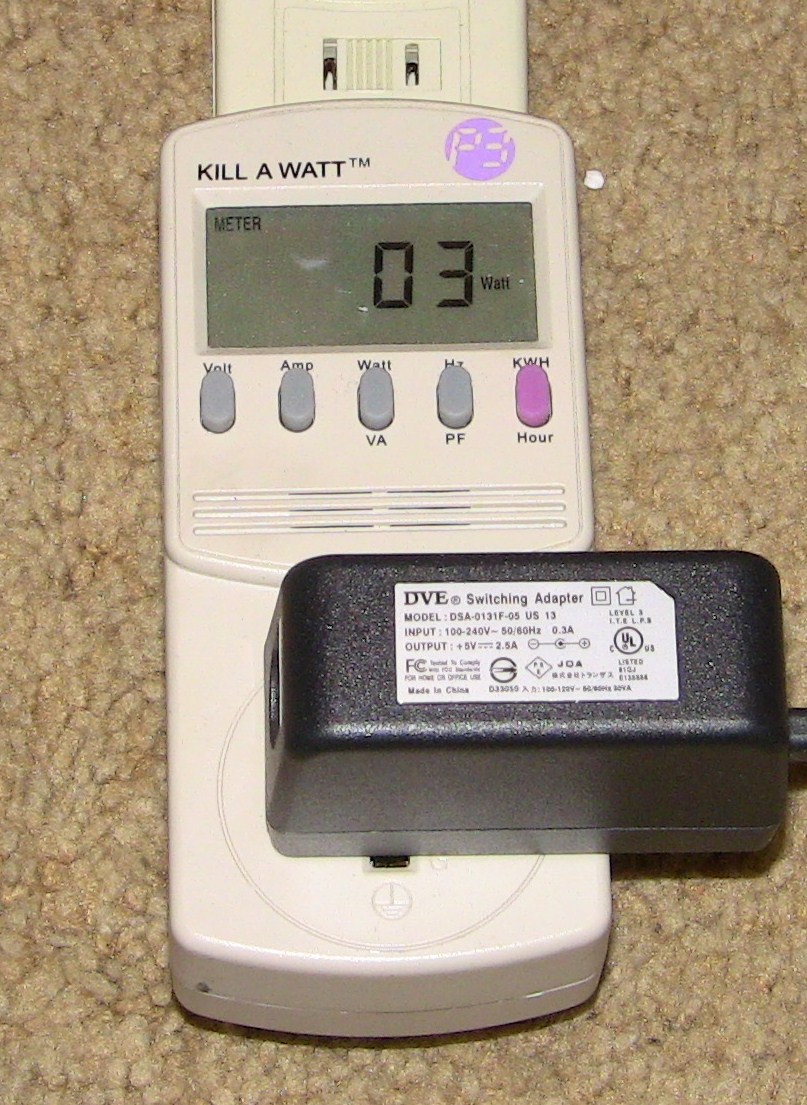
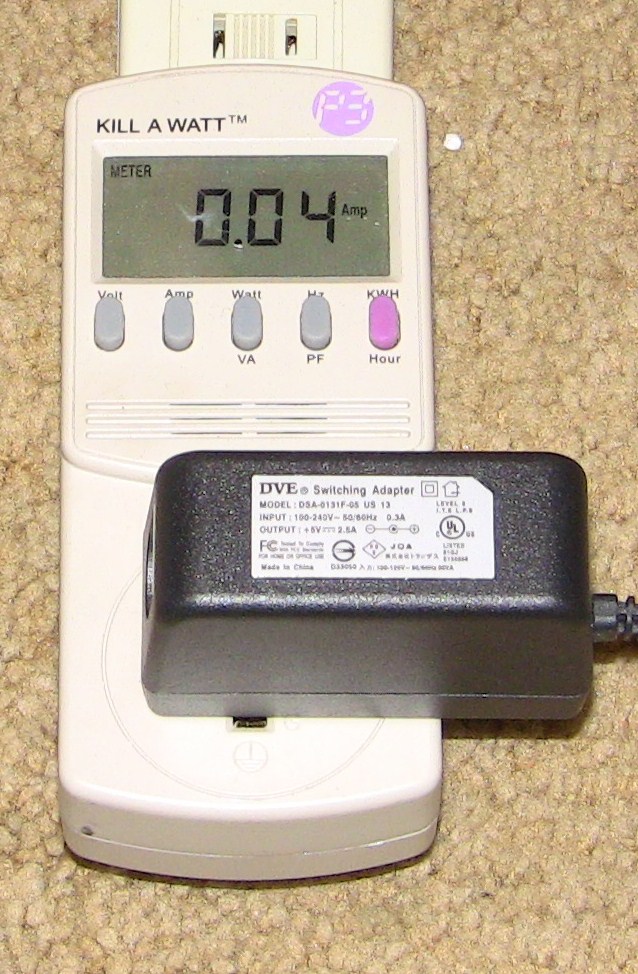
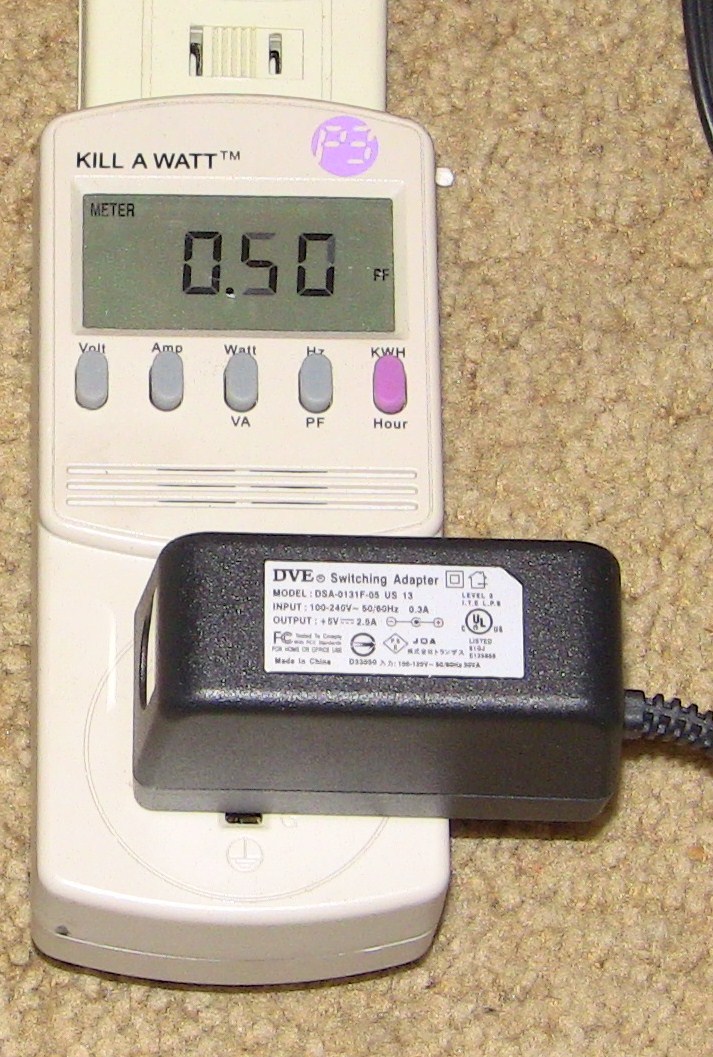
5vdc switching wall cube:
I rummaged through my box of orphan wall adapters and found a switching one! No idea what it was used for or why I have it. Its a DVE Switching Adapter – Model: DSA-0131F-05 US 13; Input: 100-240V ~ 50/60HZ .3A; Output: +5V DC 2.5A; positive core 5.5mm x 2.1mm. Perfect fit! I can even put a small adapter on the prongs and send it to the UK.
In order to use this adapter I removed all the components that had to do with power supply on the board and jumpered the remaining holes so power still flowed through the circuits correctly. Having an adapter with the right barrel plug on the end really simplified this conversion.
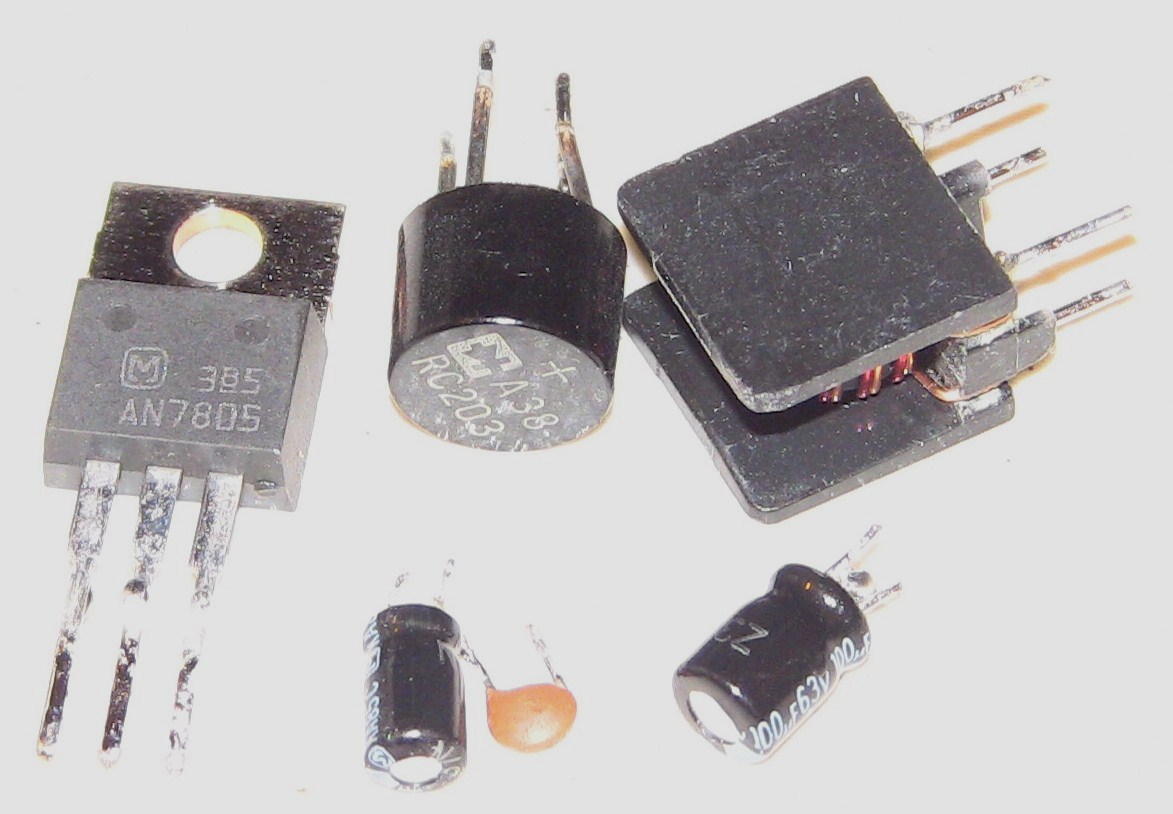
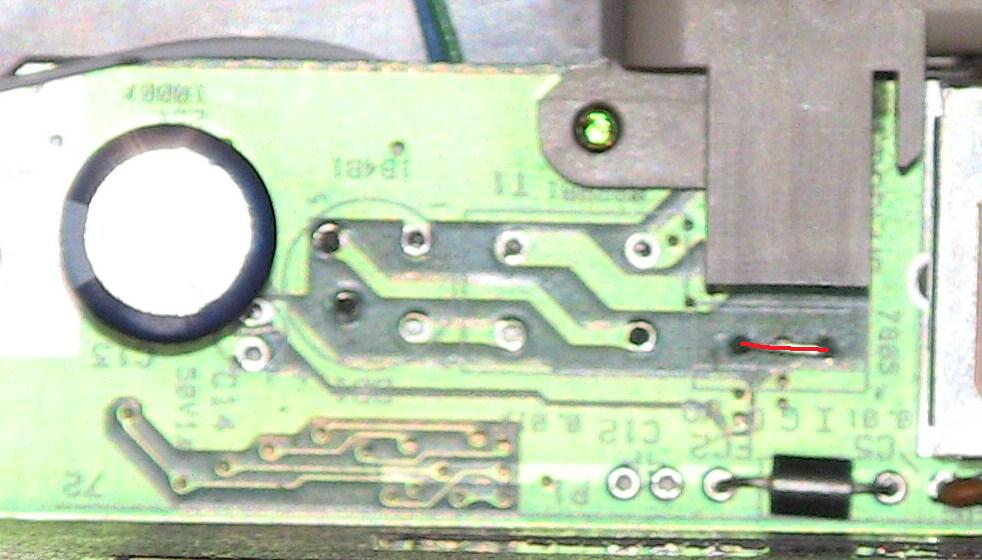
Here’s a pic of the removed components, the heat sink the 7805 bolts to is also gone since its not necessary, I left the 1500uF cap in place though.
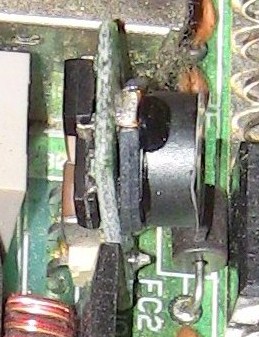
Here are a couple pics of the jumper I installed so power paths would flow as normal, 1st pic shows a jumper where the 7805 used to be, the 2nd shows 3 more jumpers installed, I drew red lines over them to make them easier to identify, ignore the wires.
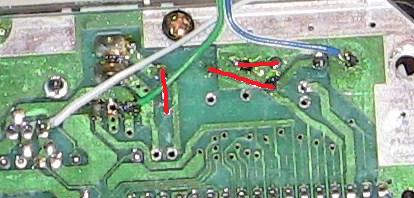
In fact I could have jumpered it so that it would work even if the switching adapter’s barrel polarity was reversed.
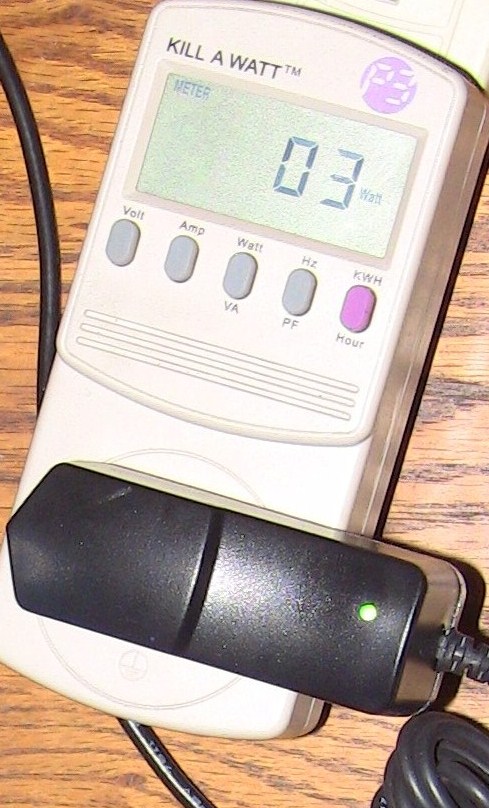
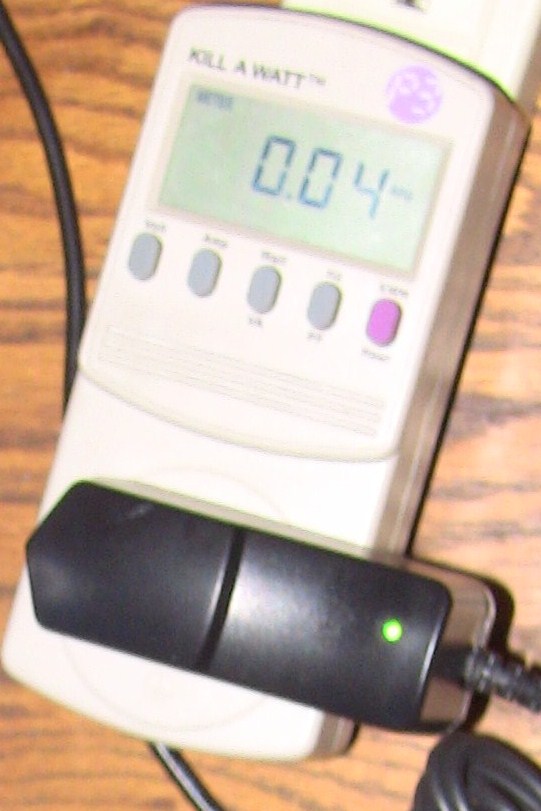
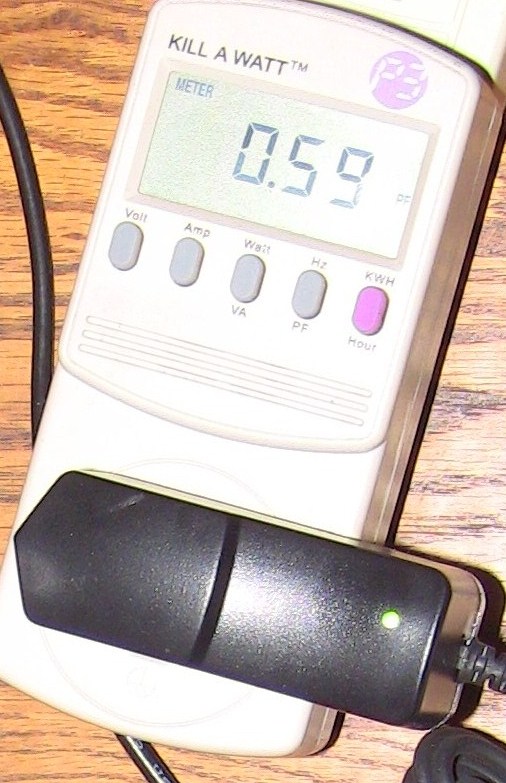
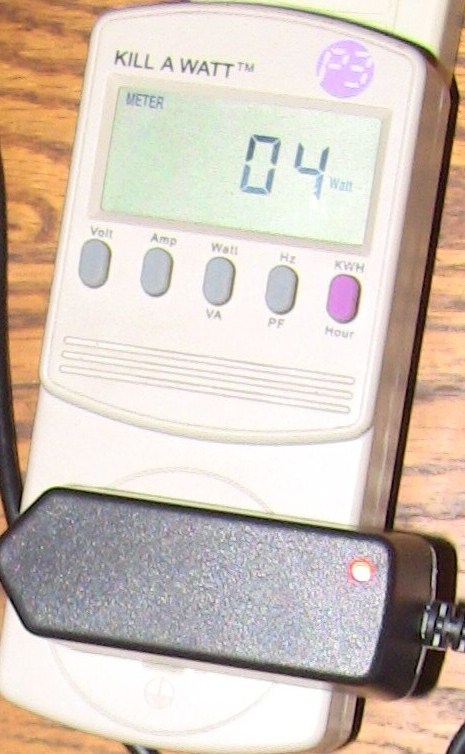
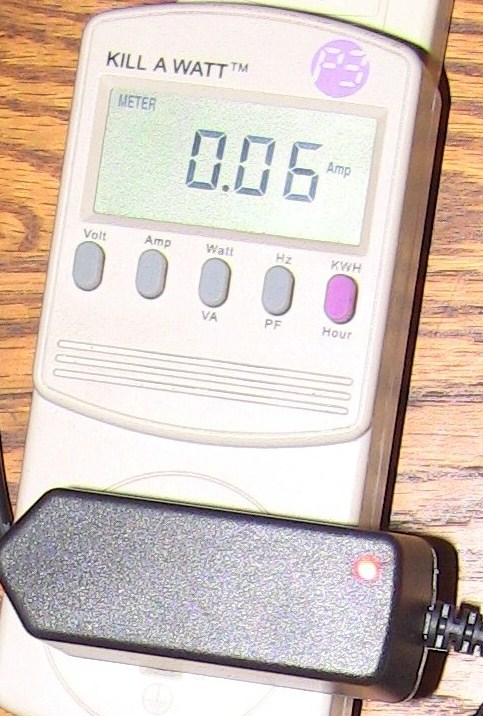
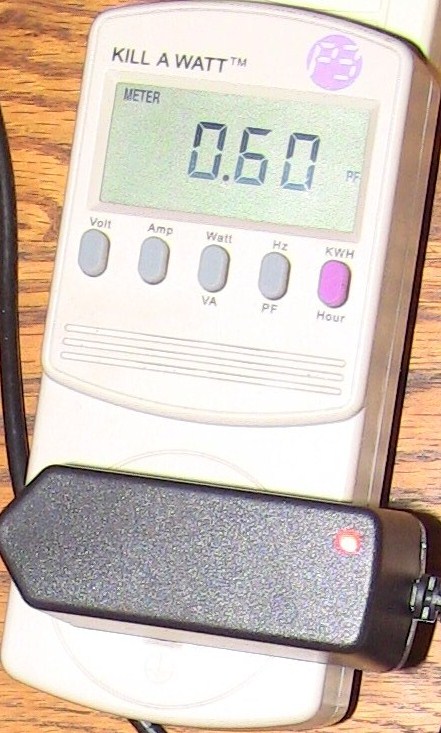
These pics show power consumption of the 5vdc switching adapter, Watts, Amps, and PF.
On a related note:
There are two theories on why the nes-101 has bad video output, we’ve pretty well established that is in fact a board design flaw of introducing interference into the video circuit by running certain traces too closely. The other theory was that the power and r/f circuits were not shielded properly or poorly designed etc.
I have already proven the a/v mod I do results in front loader quality video, but now I have proof that its not the power circuit’s fault at all.
The r/f output looks the same, poor color and jail bars, even when fed with nice +5v DC power from a switching wall adapter.
I’d do another video capture, but it’s exactly the same horrible r/f output as it was with the original power circuitry.
The idea that the power circuit was creating the poor r/f output is definitely debunked…
Benefits:
One benefit is related to my heat research, all the heat generated by the rectifier and regulator are no more. The 5VDC switching a/c adapter I used did in fact generate heat, but it was all in the a/c plug housing. No heat was generated in the area where the original power components were removed from (obviously).
IR pics of the modded nes-101 without shell and switching a/c adapter after an hour running SMB intro loop.
Noteworthy, the PPU and CPU generated the same amount of heat regardless of how it was supplied power.


Size/Weight reduction:
The NES a/c weighs 14.72 ounces and the switching a/c adapter weighs 5.44 ounces, over a half a pound lighter!
The console itself only lost a couple ounces.
The size of the adapter is also smaller than most non switching adapters.
Problems with this setup:
I am not knowledgeable enough to how to fix this yet, but maybe someone will step up. The issue is now that I modified the power circuit, but still have the same 5.5mm x 2.1mm power port, it could easily be fried if someone hooked it up to an original NES a/c adapter! Origianlly you could hook up a cheap adapter that outputs DC to the NES-101 and it wouldn’t hurt anything, but with this mod anything BUT 5vdc will damage something.
One possible solution it to simply make it an internal switching supply and have a standard a/c cord power port. That sounds great, but I dont like that heat will once again be created inside the shell and i’m not sure if I could find room. Also, I don’t want to even try to modify that power port, its molded all together right there and is a big part of the structural integrity of that piece.
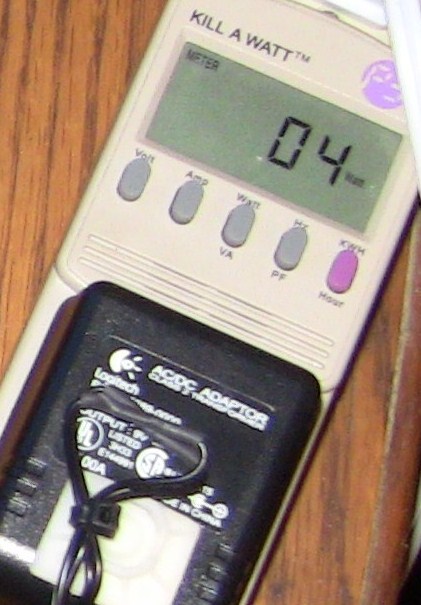
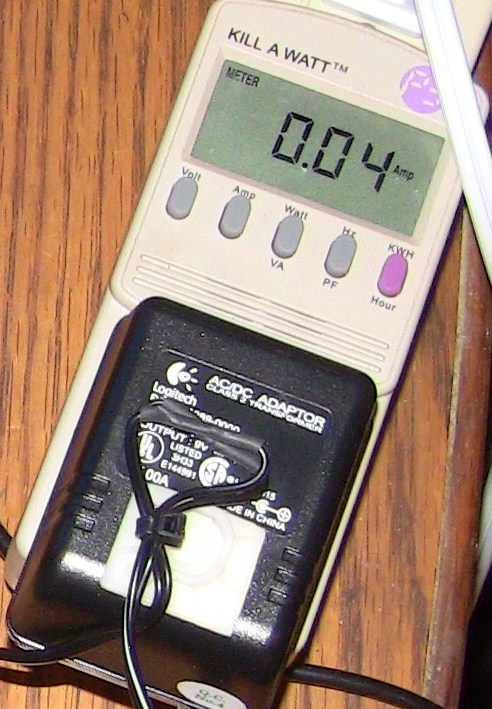
Problem solved – 9V DC and 12V DC Switching Wall Cubes:
I found a chinese seller with CHEAP 9 and 12 volt dc switching wall cubes with the correct barrel jacks and ordered one of each.
Power consumption readings with an 9vdc switching wall cube running an unmodded nes-101:
Power consumption readings with an 12vdc switching wall cube running an unmodded nes-101:
Only notable findings is the 9vdc adapter uses the exact same power as the 5vdc adapter discussed above, and requires no console modding.
Switching regulator:
What about just upgrading the existing 7805 to a switching regulator?
I had a switching a/c adapter on hand so that experiment was executable right away, but I ordered a prebuilt swithcing regulator and all the parts to build one on my own for lower cost, $10 for prebuilt and $4 for components to build it myself…
Here’s a pic of the drop in replacement unit I bought for $9.90 from Mouser.
I haven’t gotten the build it yourself regulator built yet, but I followed the regulator’s recommendations for external parts so maybe they will show better performance or I can at least identify what components are creating all the heat. Stay tuned…
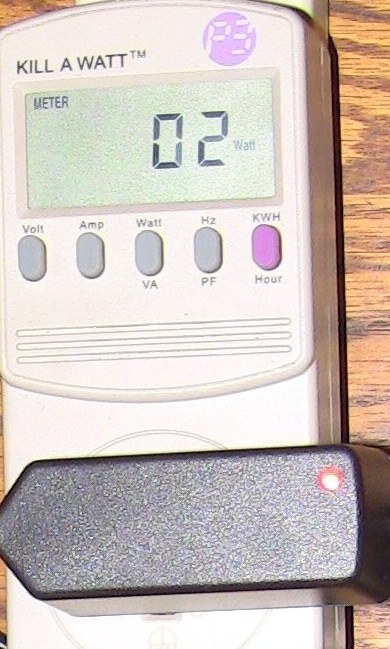
Power consumption readings with an nes-002 9vac wall cube running an nes-101 with switching regulator:
Note that this is half as much watts, same amps, and way lower PF than the same adapter powering a nes-101 with a 7805 regulator…
Power consumption readings with a 9vdc wall cube running an nes-101 with switching regulator:
One less watt, same amps, way lower PF…
Power consumption readings with a 9vdc switching wall cube running an nes-101 with switching regulator:
Also some notable difference between 7805 and switch reg, but same wall cube, less watts, same amps, lower PF…
Power consumption readings with a 12vdc switching wall cube running an nes-101 with switching regulator:

This time they all went down, half the watts, .002 less amps, and again lower PF.
Conclusions:
Don’t use anything over 9 volts unless you like to waste electricity, but dont worry about it burning up your console if thats all you have.
You can save a little power by using a 9 volt DC adapter, tip polarity doesn’t matter as long as its a 5.5mm x 2.1mm barrel it will work.
Other things to look at:
The Bridge Rectifier:
This is a big source of heat and also has an inefficient 1.1 volt drop accross it limiting what we can feed the console with. I haven’t looked at it too hard yet, but I did order 4 Schottky diodes to replace original rectifier and test, just haven’t gotten to it yet…
I’ve read there are much more efficient diode bridge designs using mosfets and control circuits, but haven’t researched enough to see if anyone offers a drop in replacement like the switch reg or if I have to build one or if its even doable…