Description
The repro-X pcb can be used to make reproductions or new/homebrew games to play on real hardware.
It’s capable of these mappers: (click on mapper to see list of games that use it)
Simply solder the correct jumpers to use the pcb for any of the above mappers. Any size eprom, eeprom, or flash chip between 64Kb and 8Mb can be used.
Here are the videos I made about this project:
ReproX NES pcb project for discrete mappers reproductions Pt1 – initial testing
ReproX NES pcb for discrete mappers repros Pt2 – next rev testing
ReproX – final testing b4 production – crc checking
Here is the ‘how to use’ page – LINK
This pcb was designed to fix issues I seen on other ppl’s repro boards. The cart edge is double beveled for easy insertion in to the console connector like original carts. It uses gold plated fingers as well as all the other IC and component pads. It has the cutouts that surround the bosses to help hold the pcb in place better so it’s not relying on just the little tab near the finger edge to keep it from pulling out the bottom of the cartridge if inserted in a very tight console connector, like old retro duo’s etc. It uses easy jumpers to consolidate IC footprints and simplify assembly. I also added a white block of silk screen so you can write on the pcb what it is or used for, I.E. ‘cnrom test board.’
Plus it’s cheaper and does more mappers than most other repro boards!
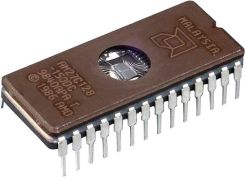
I have some 27c128 and 27c020 eproms on hand that are new and blank with straight legs. Remember, 27c128 is 128 kilobits or 16kiloBytes(kB), so the prg or chr file can only be 16 kilobytes, 16kB, that’s after you split the game rom. 27c020 is 2Megabits or 256megaBytes, so they can hold a prg or chr file upto 256MB.
I also have lots of all the other sizes, but are used with stickers on top, bent legs, and not blank. I haven’t decided if anyone would want to bother buying these here because of the hassle, but if you’re interested contact me.
I will not program ICs for you! Sorry
You will need your own programmer and know how to use it, I don’t make enough money off this kit to teach you. There’s plenty of videos out there on how to make repro’s including how to program eproms.
The CIC clone is necessary to play the game on an unmodified NES console. It acts like the original lockout chip so the console will think it has a licensed game in it and work normally. Chip is sold programmed, tested, and set to work with an ntsc US front loader console.
If using on a pal console simply hit resest until it sets itself to pal and stops flashing on/off.
Next you will need mapper ICs.
The 74*161 IC goes in all mapper configs except NROM.
The 74*32 goes in U*ROM mapper configs.
If you are doing mapper configs of UNROM, UOROM, ANROM, AMROM, AOROM, and BNROM, you will need CHR ram ICs. I use the 6264 as was used in most original games, or the very similar 62256.
You will need one 10k resistor per board if using a 32 pin IC for PRG, it was put there to possibly aid in programming flash etc through the Kazzo dumper. This resistor pulls high when pin 31 of the PRG is not connected to anything via exp0, pin 16 of the cart connector. The Kazzo will pull it low for programming.
Check the datasheet of your ICs, find the mode select table, and make sure read mode is high and program mode is low for PGM or WE.
I have not tested with a Kazzo, but the resistor does need installed even if you don’t plan to use a Kazzo.
It looks like OE needs to be high for writing to most ICs and I have it tied low permanently so programming with the Kazzo may not work anyway with this rev of ReproX.
If using a 28 pin IC for PRG this is not needed.
The smd resistor is a 0603, very small, you’ll need skill and tweezers!
I highly recommend you buy at least one extra board for testing your burned rom ICs before soldering them to the reproX. Install sockets in place of the PRG, CHR, and mapper IC footprints and now you can test it out before you’ve gone too far!
You will also need capacitors. You can install through hole or surface mount versions. 3 are needed for nrom configs and 4 for all other mapper configs.
The smd cap is a 0603, very small, you’ll need skill and tweezers!
The cart cases are excellent quality, but I have limited quantities and only clear and black for now.
Comes with screws as seen in main pic.
I started a forum thread on NesDev for people to ask questions about this project as I want it all to be accessible for all who are looking for similar answers to common problems as I just dont’ have time to write up a FAQ etc.


Reviews
There are no reviews yet.